You can completely customize your platform within the Landing Page settings. Everything from your logo, color-scheme, to landing page content can be updated within this section.
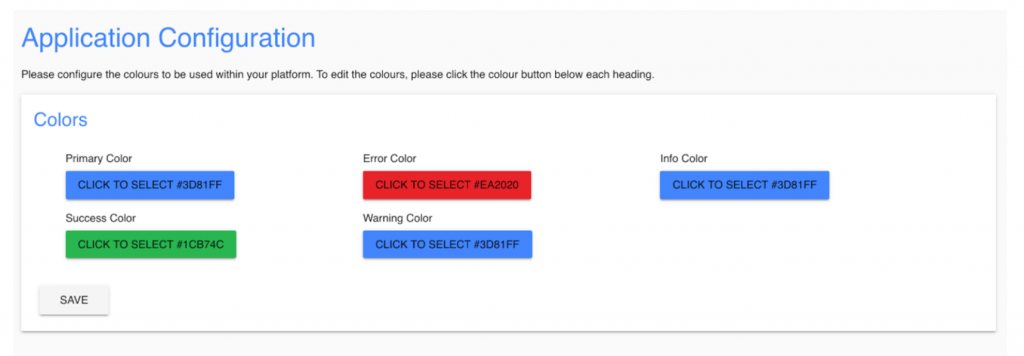
Color Scheme
This section will allow you to adjust the colors of your platform. Simply click on a color to update it.
● Primary Color: This is the primary color propagated through your platform (landing page, main nav bar color, and other predominant sections in the platform
● Error Color: When an error occurs or your client doesn’t complete an intake form question, this is the color of the warning that is displayed
● Info Color: For any dialog boxes in the platform that showcase tips to clients around usage, this is the color
● Success Color: When a save or success occurs, this is the color of the function or text that appers.
● Warning Color: For warning notifications in the platform (eg. consultation being recorded), this is the color that appears.
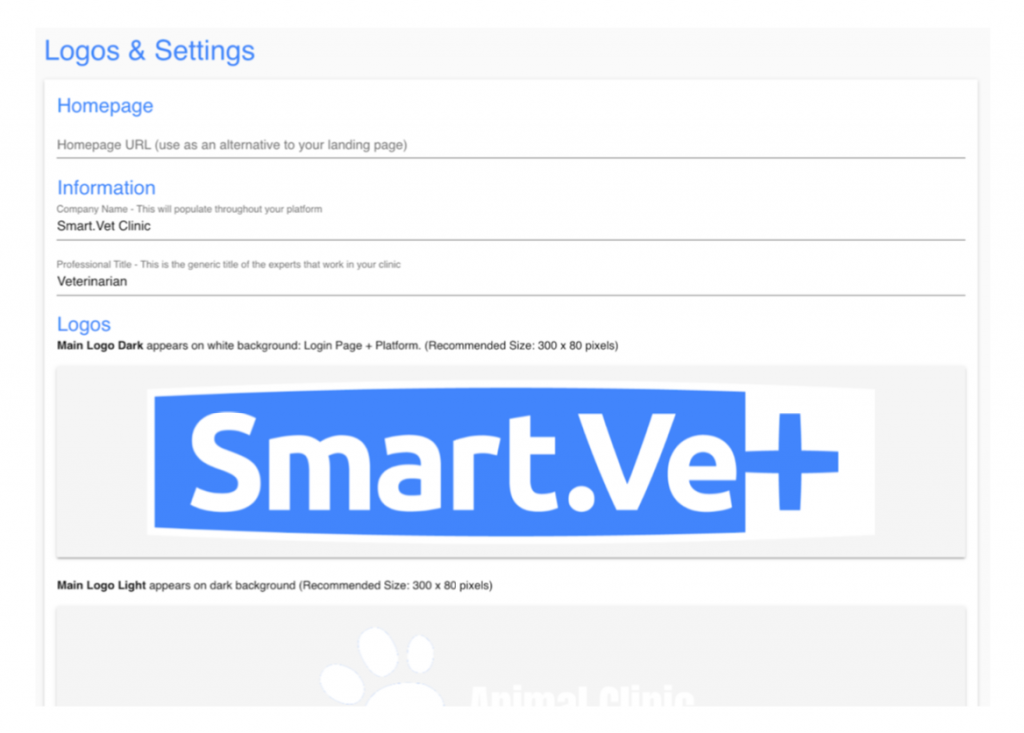
Logos and Settings
This section will allow you to update your logo, favicon, and titles within your platform
● Company Name: This is the name of your clinic. This appears on the email notifications that your staff and clients receive
● Professional Title: This is the title of your staff that is visible in your client’s view
● Main Logo Dark: This is a dark version of your logo, and is only used on the login page
within the mobile view of your website. It’s rarely used,
● Main Logo Light: This is a regular version of your logo and is the primary logo
displayed through the landing page and platform.
● Favicon: This is the small icon that appear in browser tabs.
Landing Page Editor
Our landing page editor allows you to completely customize your telehealth landing page. Everything from the text, pictures, and layout can easily be updated within the editor.
The landing page is built using ‘blocks’. The blocks can be vertically rearranged, and each block can be edited. You can also add new blocks as well.
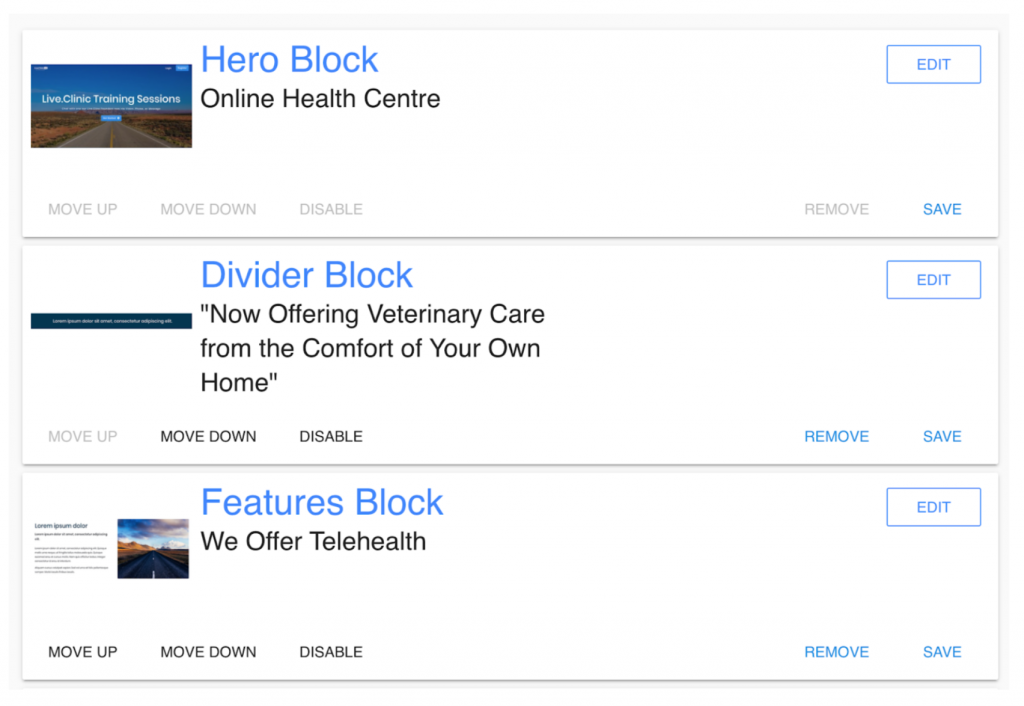
Editing an Existing Block:
You can edit a block by clicking the ‘Edit’ button located on the right of each block. This will load the editable elements of the block. Feel free to update the text and pictures. To update a picture, click on the picture to change it. Be sure to click ‘Save’ at the bottom of each block
Changing the Order of a Block:
You can arrange the order of a block by clicking the ‘Move Up’ or ‘Move Down’ button on each block.
Disabling a Block:
You can disable a block from appearing on your home page by clicking ‘Disable’. You can also re-enable a disabled block by clicking the ‘Enable’ button.
Removing a Block:
You can remove a block by clicking the ‘Remove’ button. Please note that a block can’t be restored after it’s removed.
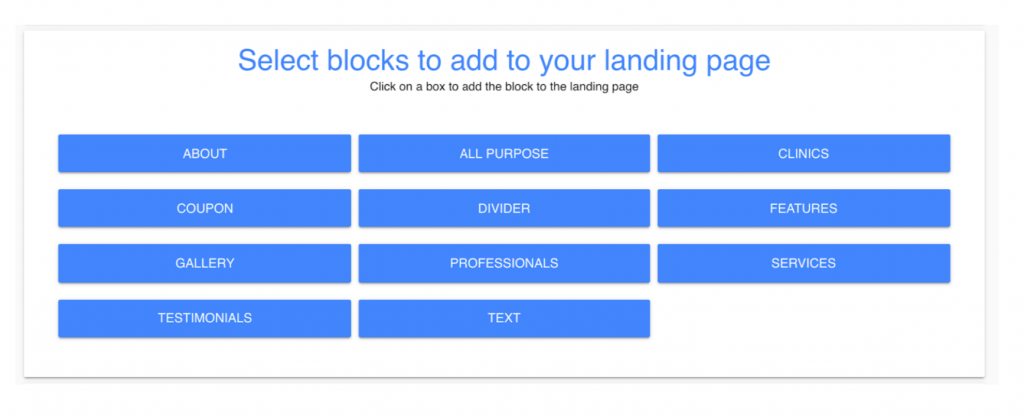
Adding a Block:
You can add new blocks as well. Scroll down to the bottom of the landing page editor page and you will see the ‘Add a Block’ section. To add a new block, click on the block that you would like to add, and it will automatically add it to the bottom of your landing page. You can use the ‘Move Up / Move Down’ buttons to find the perfect position for the block.